I fell hard for soymilk in Taiwan—specifically the warm, sweet kind that wraps around you like a hug.

It started at the picturesque Sun Moon Lake, where the lovely homestay owners cooked breakfast themselves. I chose the Western option (it was shakshuka!), but they also provided thermoses filled with warm sweet soymilk. I’d pour cup after cup, alternating between savory eggs and sweet soy, feeling completely content.
Then my obsession continued at our homestay in Alishan. The mountain air was biting cold, and every morning I’d drink copious amounts of warm soymilk to thaw myself from the inside out. There was something about the way that creamy warmth spread through my chest that made those chilly mountain mornings bearable, almost a magical experience in itself.
Then in Taipei, at a breakfast shop near my Airbnb, I discovered the other soymilk evolution: salty soymilk (鹹豆漿). Mind-blowing in a completely different way. That recipe is coming up next, by the way.. stay tuned!
[toc]
Proof that Taiwanese Breakfast is Superior
The Problem: Post-Taiwan Cravings 😭
Since I’ve been back in Jakarta, I’ve been craving that exact taste.
The thing is, the local shops’ soymilk doesn’t scratch the itch. The store-bought ones? Even worse. Too watery, too sweet, or with that weird aftertaste that screams “I was made 3 months ago.” None of them captured that fresh, nutty, creamy taste I remembered from Taiwan.
So I decided to take matters into my own hands and make it myself. How hard could it be?
That’s my toxic trait, by the way 😂
Turns out: surprisingly easy. And SO much better than anything I could buy.
Soymilk Benefits
Beyond the nostalgia factor, soymilk actually has some pretty solid health credentials. It’s one of the few plant-based milks that rivals dairy in protein content. It has about 7-9 grams of protein per cup, which is roughly the same as cow’s milk.
For anyone avoiding dairy (whether due to lactose intolerance, allergies, or personal choice), that’s a big deal.
The isoflavones in soy have been studied extensively for heart health benefits. Research shows they can help lower LDL cholesterol (the “bad” kind) and may reduce the risk of heart disease.
For women specifically, these same isoflavones might help with menopausal symptoms and bone health, though the science is still evolving on that front. I’m not making any grand health claims here; just sharing what the research suggests.
Another thing I appreciate: soymilk is naturally low in saturated fat and contains no cholesterol. Store-bought versions are often fortified with calcium and vitamin D. Though obviously homemade soymilk won’t have those additions- unless you supplement separately. Still- you’re getting quality plant protein, healthy fats, and various minerals from the soybeans themselves.
Is it a miracle food? Nah. But is it a nutritious choice that also happens to taste amazing homemade? Yes!!
The Shopping Mission
I went on a hunt for the best soybeans I could find. After wandering through the Shopee interface, I found a vendor selling non-GMO local soybeans. Bright yellow, skinless, plump, and fresh-looking. I bought 500g and crossed my fingers.
Are there actual benefits to non-GMO soybeans? Honestly, I’m not sure. They do look good quality, and I figured if I’m going through the effort of making soymilk from scratch, I might as well start with the best quality beans I can find. 🤷♀️
How to Make Homemade Soymilk
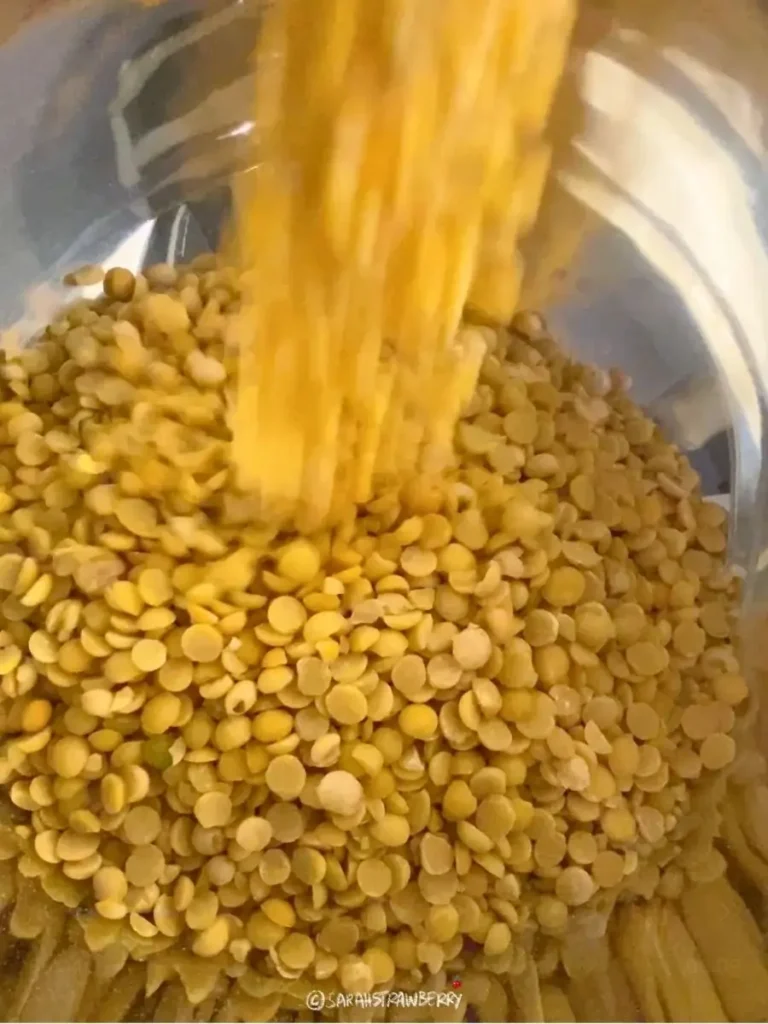
Making homemade soymilk is surprisingly straightforward once you understand the basic steps. The entire process begins with soaking dried soybeans overnight, which allows them to soften and roughly double in size. This is essential for creating that smooth, creamy texture.
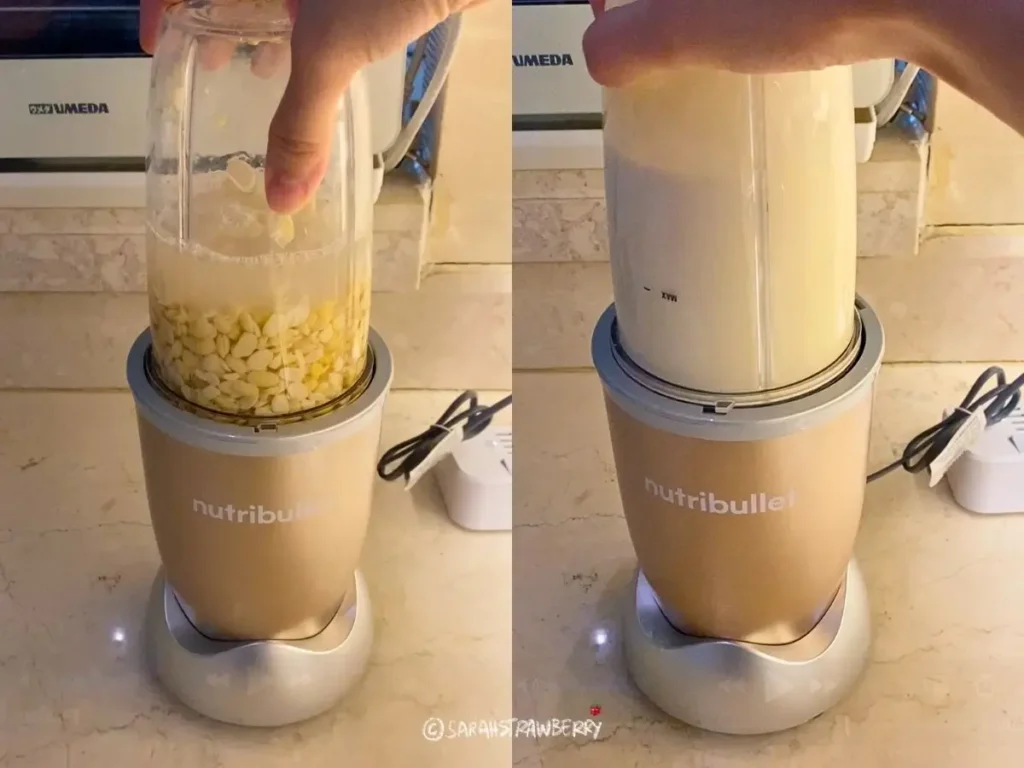
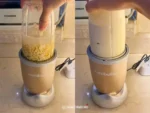
After soaking, you’ll drain and rinse the beans before blending them with fresh water until completely smooth. The ratio of soaked beans to water determines your soymilk’s richness, with most people using about 1 part beans to 5 parts water for a consistency similar to store-bought soymilk.

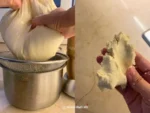
Once blended, the mixture needs to be strained through a nut milk bag or muslin cloth to separate the liquid soymilk from the solid okara (soy pulp). This straining step is crucial; you’ll need to squeeze firmly to extract as much liquid as possible, which is where most of the flavor and nutrients are concentrated.
Pro Tip: Before cooking your freshly strained soymilk, there’s a traditional anti-burn trick that makes cleanup infinitely easier: wet the inside of your pot with cold water, swirl it around, and discard it before adding the soymilk. This creates a protective barrier that prevents scorching (especially if you’re using stainless steel!).
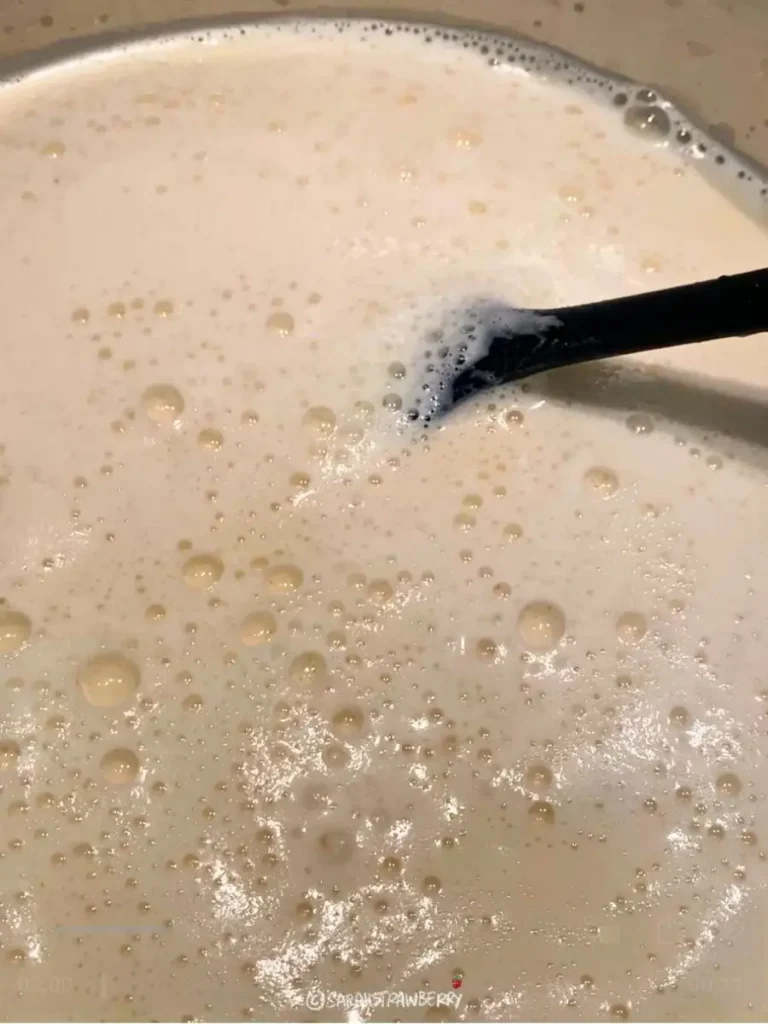
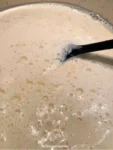
The final step is cooking the soymilk over low to medium heat for about 20 minutes, stirring frequently to prevent skin formation and burning. Raw soymilk contains enzymes that can cause digestive discomfort and has an unpleasant beany flavor, so proper cooking is essential.
As the soymilk simmers, you’ll notice the raw smell transforming into that warm, nutty aroma that makes homemade soymilk so irresistible. If you’re making sweet soymilk (highly recommended if you want to recreate that Taiwan experience!), add sugar while it’s still hot so it dissolves completely. The entire process from start to finish takes about 20-25 minutes of active time, plus overnight soaking.
If you are open to trying savory soy milk, try making a salty soymilk! Please do let me know if you’re interested for the recipe.
Soymilk Recipe Video
Homemade Soymilk Recipe (豆漿)

Make delicious homemade soymilk at home!
- 500 grams soybeans (I used non-GMO local soybeans)
- 4-6 liters water (depends on the thickness you want)
- to taste sugar
Cover dried soybeans in plenty of water and soak them overnight (8-12 hours). They will double in size- make sure you have enough water to cover.
Drain the soaked beans and give them another quick rinse. Then blend them with fresh water until smooth. The ratio is 1 part soaked beans to 5 parts water (but feel free to experiment).

Place a nut milk bag or muslin cloth over a large bowl, pour in your blended mixture, then gather the edges and squeeze. Squeeze hard; you want to extract as much liquid as possible!
What's left in the cloth is okara (soy pulp). Don't toss it!
Pour the strained soymilk into your prepared pot and bring it to a gentle simmer over low to medium heat. Heat it for 20 minutes to cook out that raw beany flavor.

Optional: add sugar while it's still hot so it dissolves properly. I use about 3-4 tablespoons per liter, but taste as you go.
You can also keep it unsweetened if you're using it for coffee or cooking. Totally up to you!

Bean quality matters: Those non-GMO local soybeans I bought? They were plump, bright yellow, and fresh. I’m convinced good beans = better soymilk. Look for ones without dark spots or wrinkles.
Don’t skip the cooking: Some people drink it raw, but traditional preparation always includes cooking. Trust the process—it improves digestibility and gets rid of that weird raw taste.
Adjust to your taste: My first batch was too thick (used too little water). Second batch was too thin (overcompensated). Third batch? Chef’s kiss. You’ll find your sweet spot after a try or two.
Storage tips: Homemade soymilk lasts 3-4 days in the fridge. It’ll separate a bit—totally normal. Just shake it before drinking. You can also freeze it in portions if you make a big batch.
Watch for the foam: As it heats up, the soymilk creates a ton of foam and can boil over FAST if you’re not paying attention. Keep the heat moderate and don’t wander off during cooking. (I learned this the hard way.)
How I’ve Been Using Homemade Soymilk
Once you have fresh soymilk, the possibilities are honestly endless:
The Taiwan Way: Drink it warm and sweet, just like I had in Alishan and Sun Moon Lake. Pour it into a mug, add a bit of sugar, and let it warm you from the inside. Perfect for cold mornings or late-night comfort.
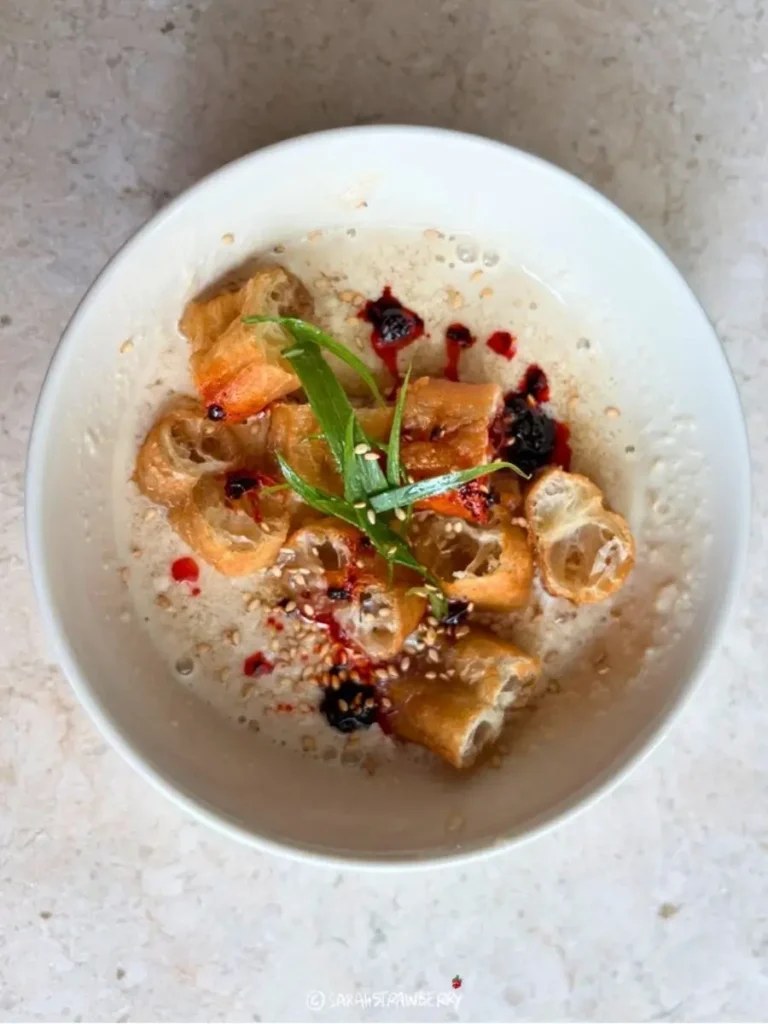
The Savory Way: Keep soymilk unsweetened and dip a freshly fried youtiao (Chinese donut) into it! The combination between crispy fried dough and warm soymilk is unbeatable! This is a commonly found breakfast in China.
In coffee: Works surprisingly well as a dairy alternative. The nutty flavor actually complements coffee instead of fighting it.
Salty soymilk (鹹豆漿): Warm, savory, AND comforting! It’s a savory breakfast dish with vinegar, soy sauce, dried shrimp, and crispy youtiao. Mind-blowingly good.
Smoothies: Adds creaminess and protein without overpowering other flavors.
Baking: I’ve been using it as a 1:1 substitute for dairy milk in recipes. Works great in pancakes and muffins.
About Soy Pulp / Okara…
The leftover soy pulp is way too useful to throw away. It’s packed with fiber and has this mild, slightly nutty taste. I’ve been adding it to:
- Fried rice (adds texture and soaks up flavors)
- Veggie burgers (works as a binder)
- Baked goods (makes them super moist)
Still figuring out the best uses for it, but so far everything I’ve tried has worked!
Final Thoughts
There’s something really satisfying about making your own soymilk. It’s not just about the taste (though that’s significantly better than store-bought), it’s about recreating those Taiwan moments in my own kitchen.
Every time I pour myself a warm cup, I’m transported back to that cold morning in Alishan, or to the cozy breakfast table at Sun Moon Lake.
The first batch might not be perfect. Mine wasn’t! But by the second or third try, you’ll figure out your ideal water ratio, sweetness level, and cooking time. Once you do.. You’ll wonder why you ever settled for the boxed stuff.
Have you tried making your own soymilk? Or do you have favorite soymilk memories from your travels? I’d love to hear about them in the comments!
Next up: that salty soymilk recipe I mentioned. It’s a game-changer for breakfast. Stay tuned! ✨
Recipe at a Glance:
- Yield: 4-6 liters
- Prep time: 15 minutes (plus overnight soaking)
- Cook time: 20 minutes
- Difficulty: Easy
- Key ingredient: Non-GMO local soybeans (500g)